After spending the better part of 5 months in New Zealand visiting with Ed’s parents, we returned to the States on February 1st, 2020; and with a rough plan for the year ahead, we began tossing around ideas for our wedding as well as continuing our search for the perfect blue water live-aboard sailboat. …Ha! But of course our rough plans for 2020 were very quickly tossed out of the window. Thank you Covid.
And so we developed a new plan for 2020; convert a gently used Mercedes Sprinter into our new home.
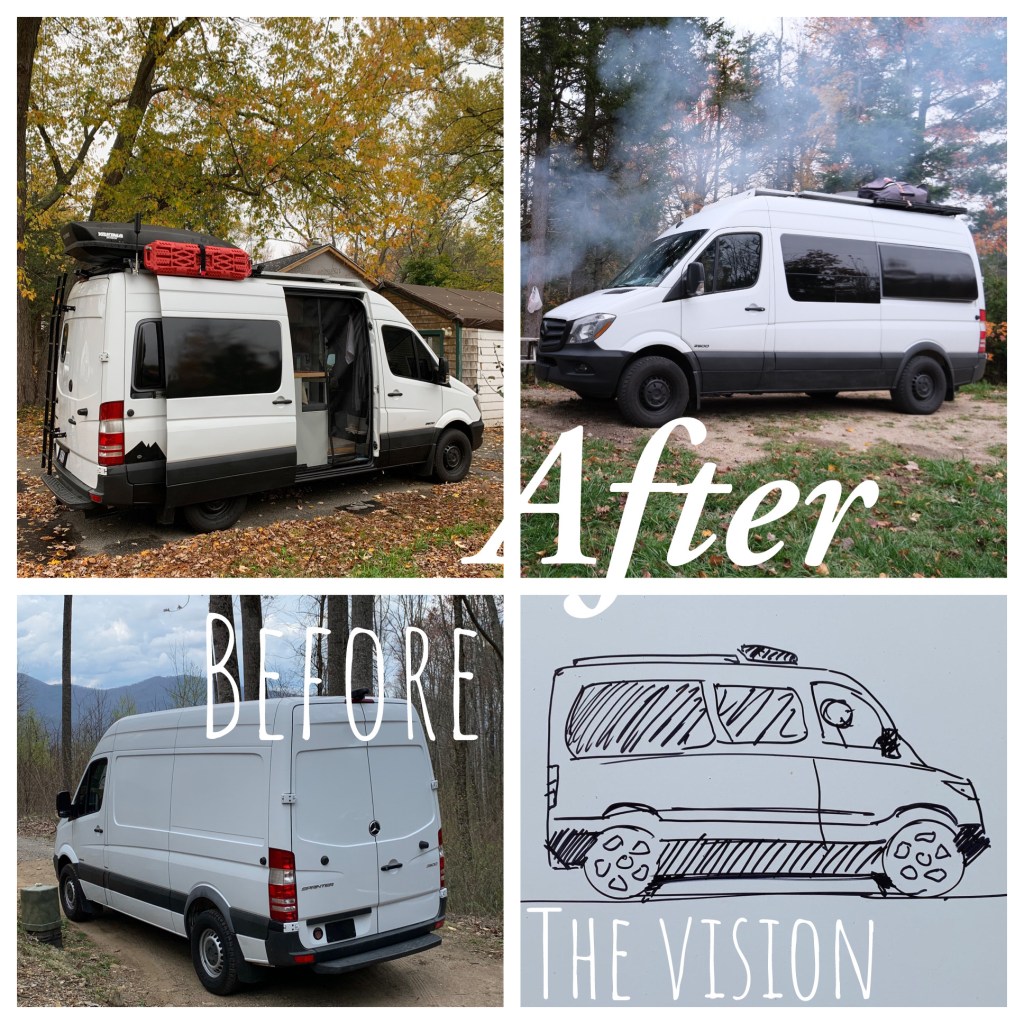
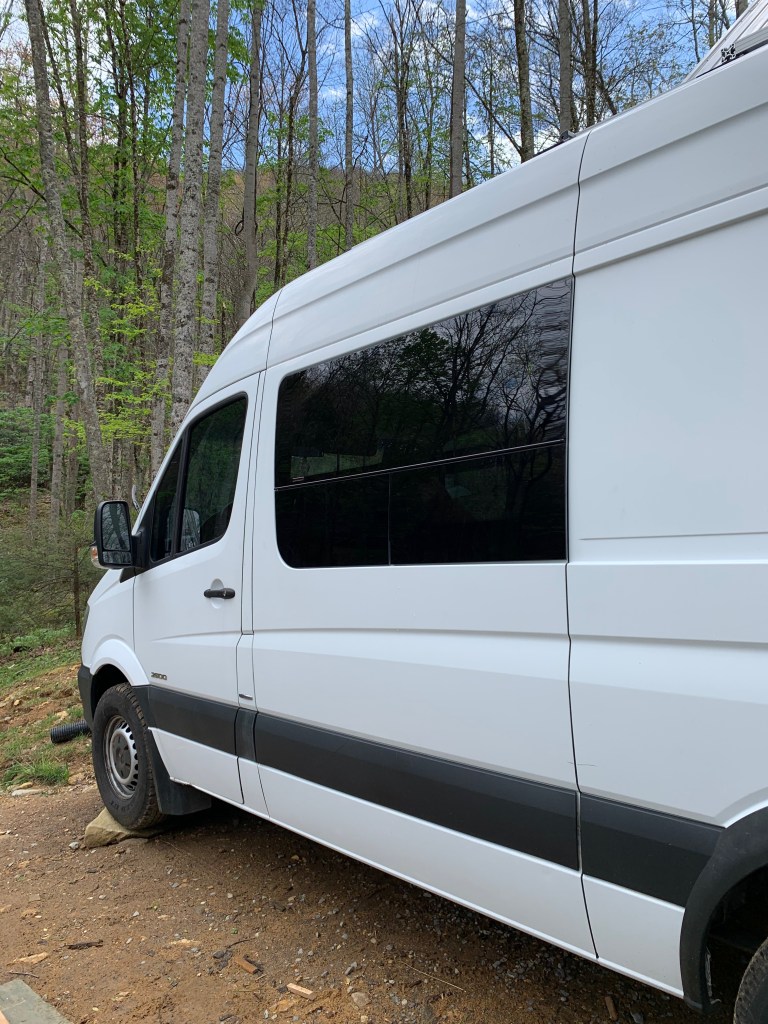
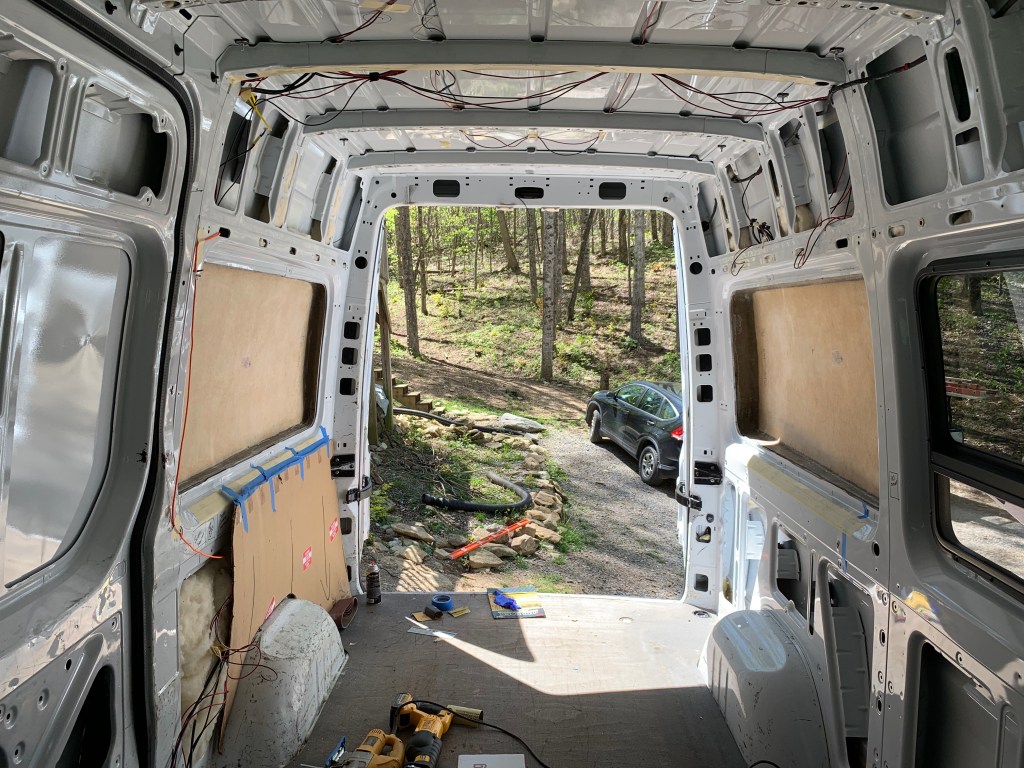
When: On April 7th 2020, after spending weeks hiding out in a family member’s cabin located in the stunning Blue Ridge Mountains, we decided to purchase Pete (aka Petey the Sprinter Van/Plan B/our quarantine project/our home on wheels).
What: Pete is a 2016 Mercedes Sprinter 2500, 144″ wheelbase, high roof, 2 wheel drive (I know, we wish he was 4wd too), 4 cylinder, turbo powered diesel. Woah, that’s a mouthful.
How long: From start to finish the buildout took us 2 months to complete. Keep in mind, we were under a stay-at-home order and we left our jobs in 2019 to travel, so we spent all of our time working on Pete.
How much (van build only; cost of van not included): After hours and hours of researching other van builds and cost of products and supplies, we set a buildout budget of $8,000-$10,000 USD. Reality check.. we ended up spending approximately $12,000 USD.
*If you’d like to see more pictures of our build and find out more details of what we used and our process, please continue reading. Thanks!
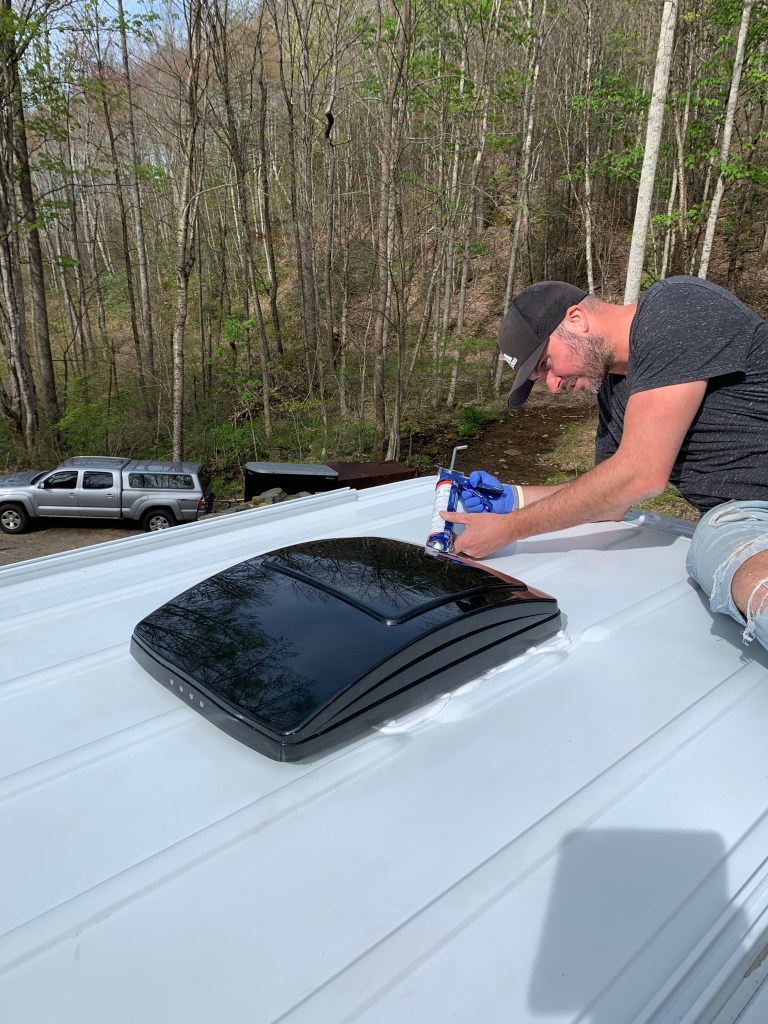
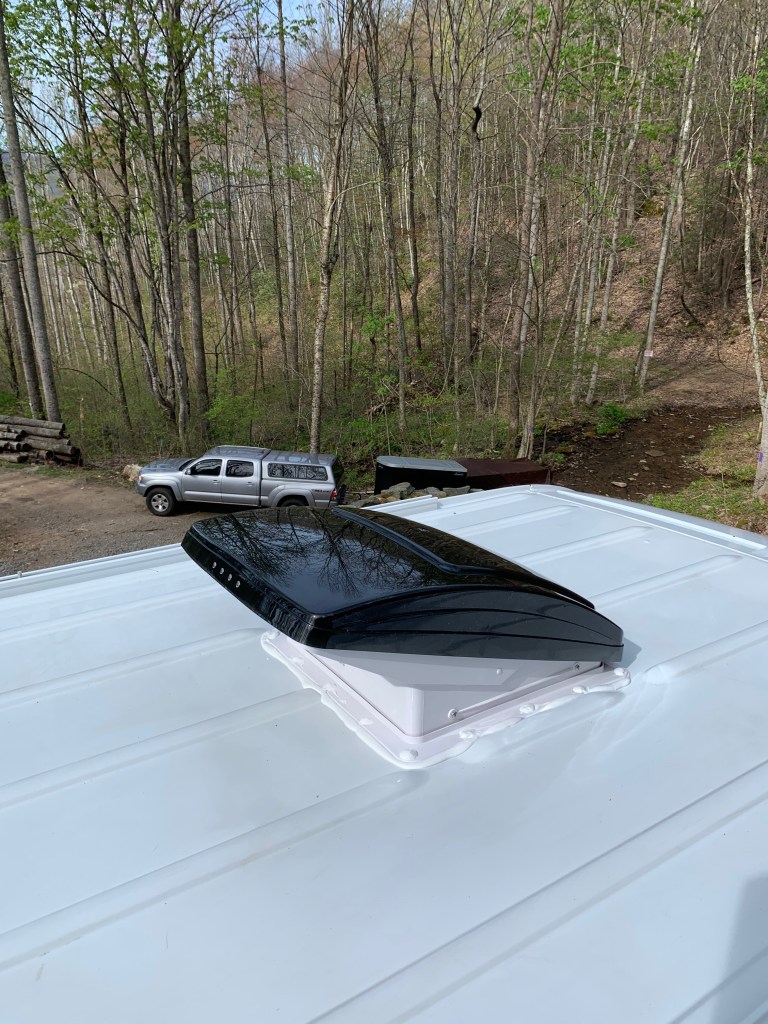
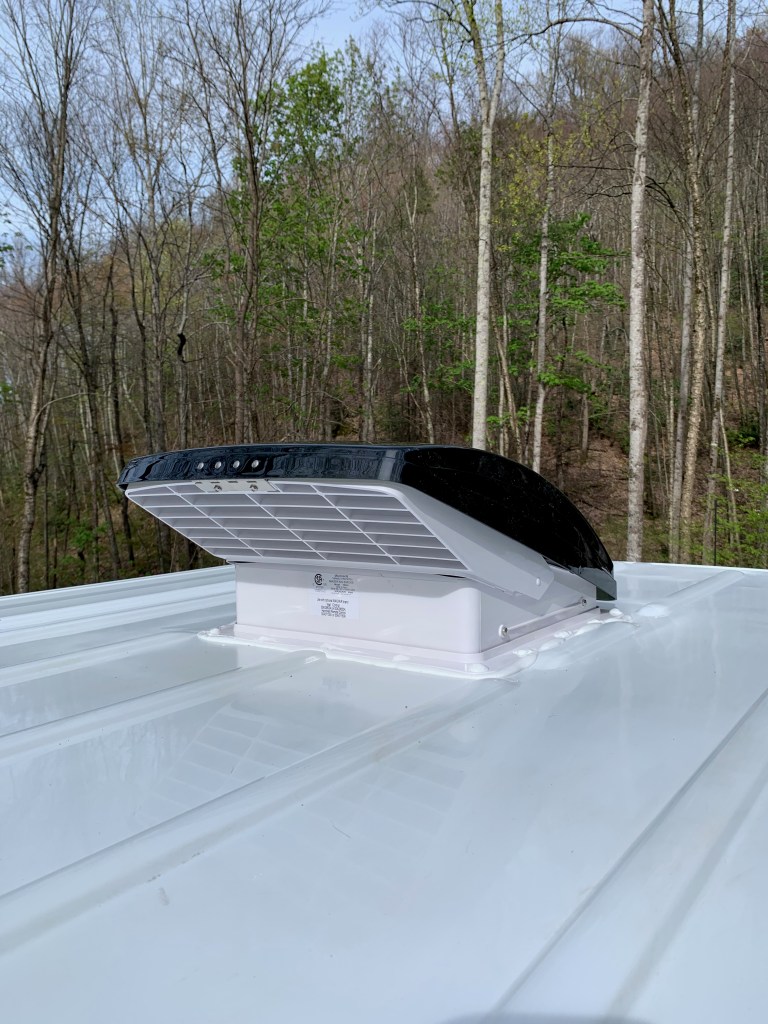
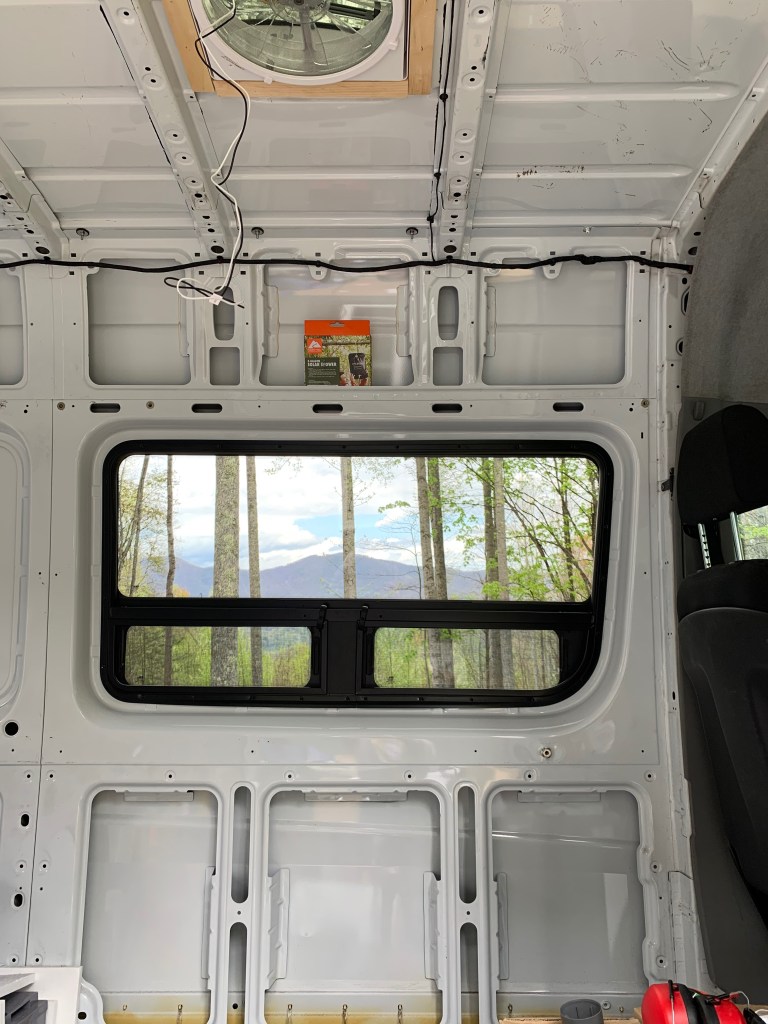
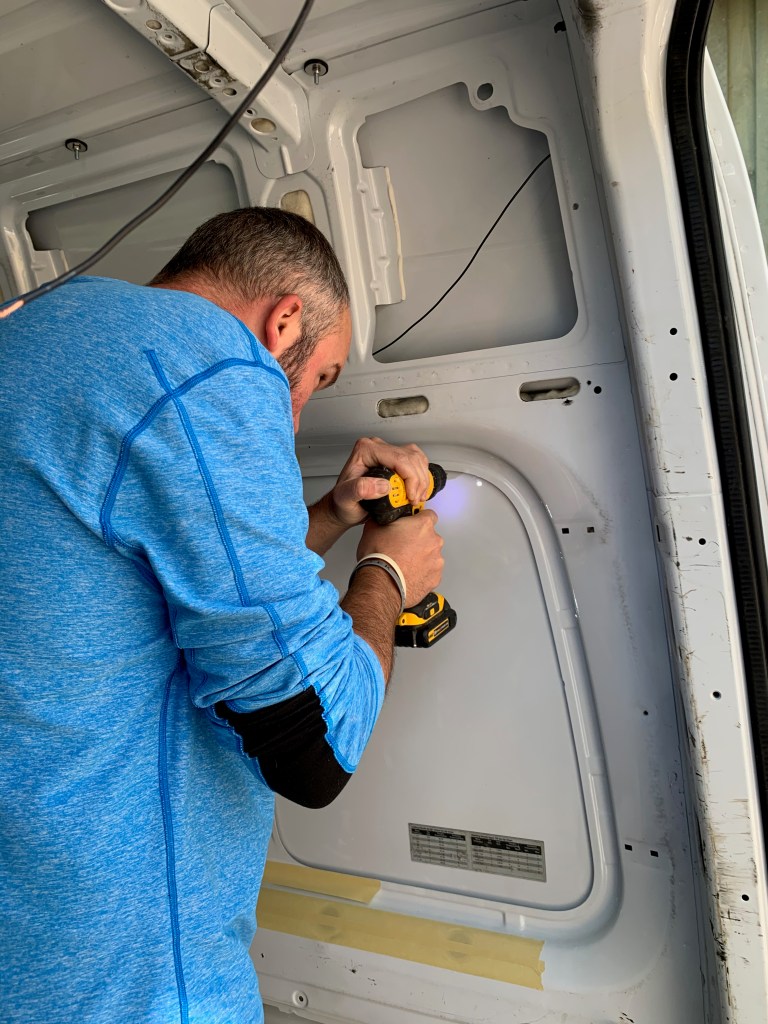
Ventilation: First thing’s first, cut out a hole for a fan/vent. Such a scary thing, cutting a massive hole into the top of a solid water tight surface… but apparently we loved doing it so much, we decided to cut another 4ish or so holes into Petey. We went with a Maxxair fan with remote and manual control options. Click through the slideshow below for our install process.

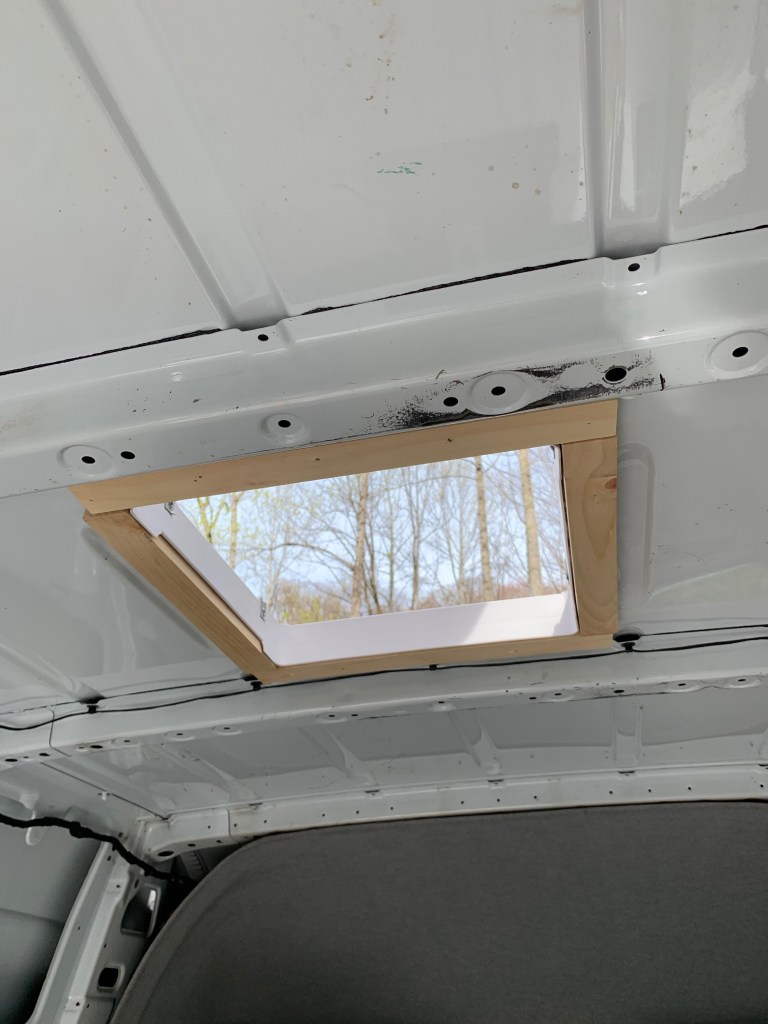
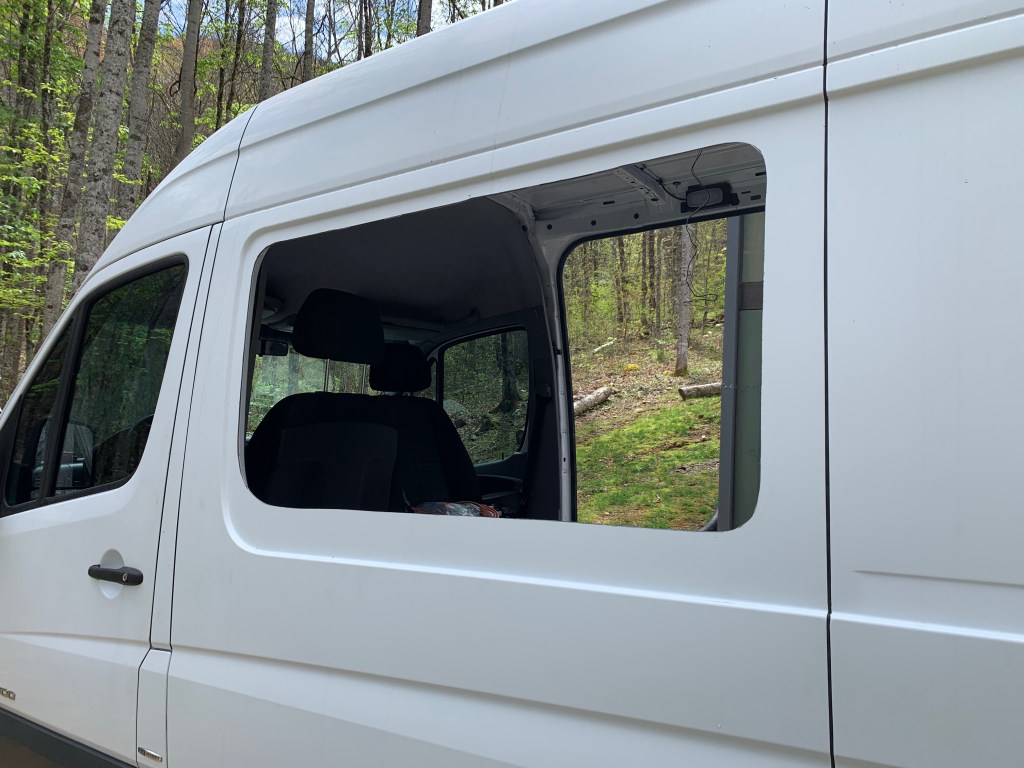
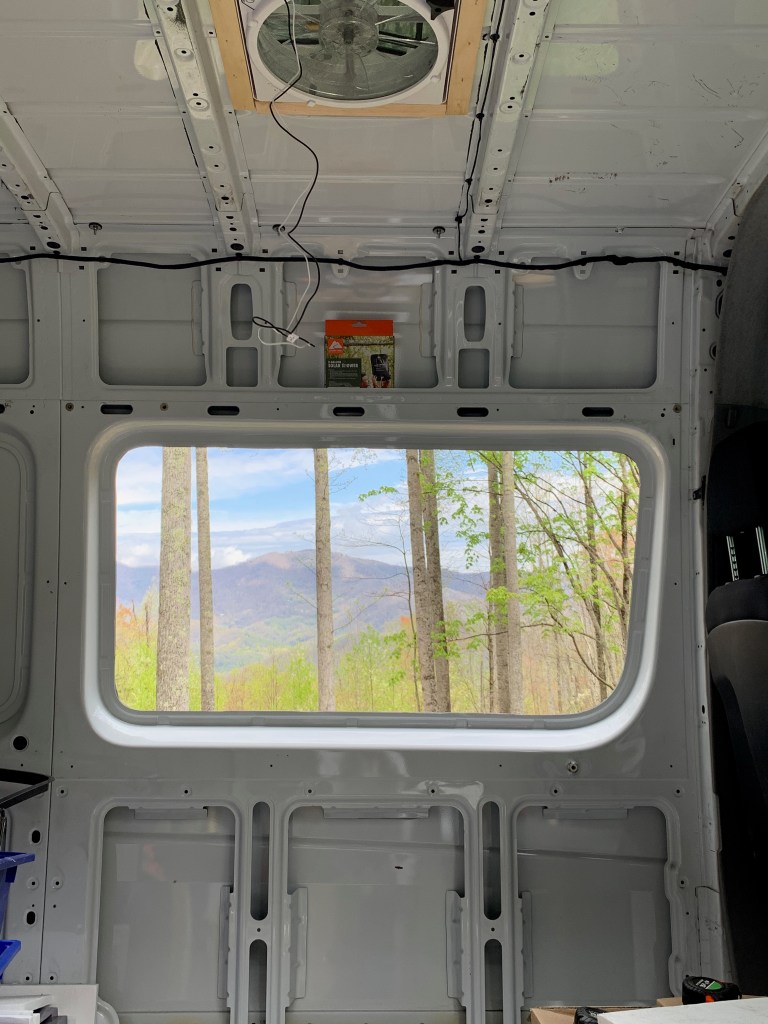
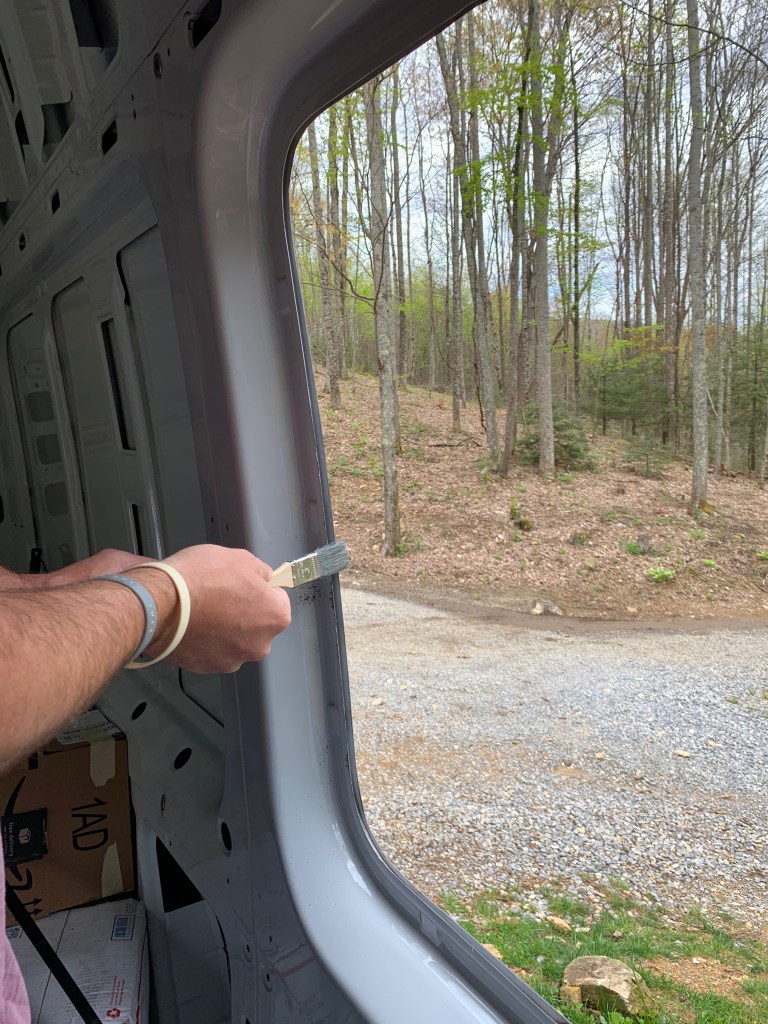
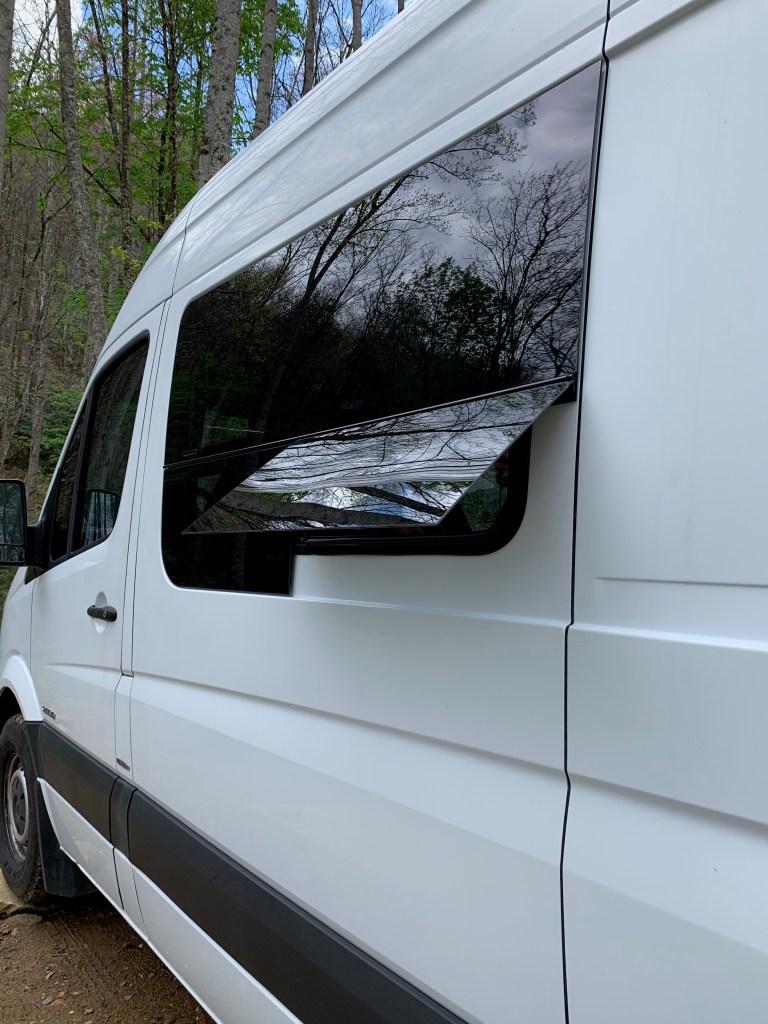
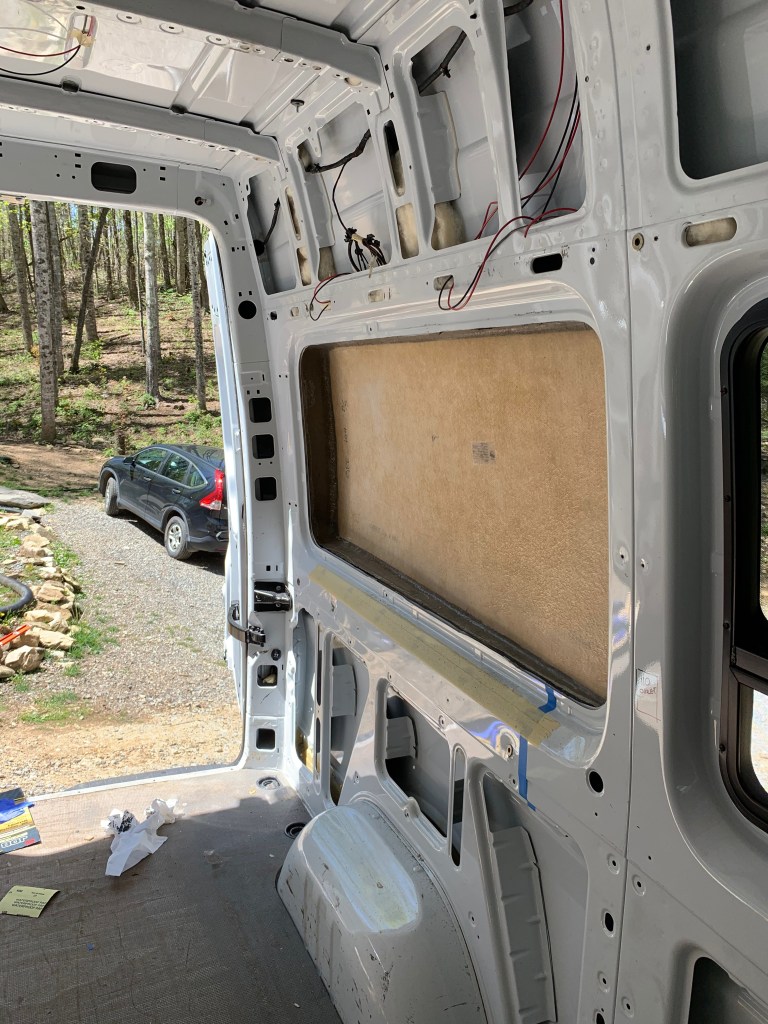
Adding a window: The next hole we cut in Petey was a bit larger than the first. While Ed was hoping to make our van as stealthy as possible (in the beginning), I wanted a window in the future kitchen space to let in natural light. In the end, we’re both glad we added the window. We went with a dual vent window from Van Windows Direct. View the slideshow below for our install process.
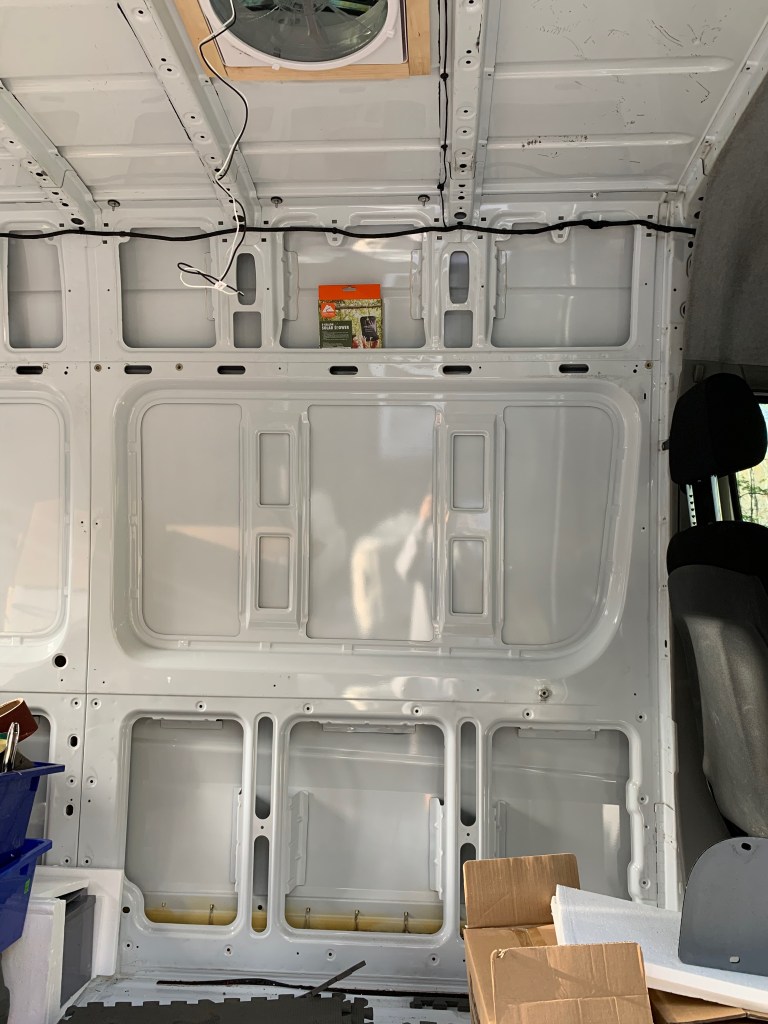

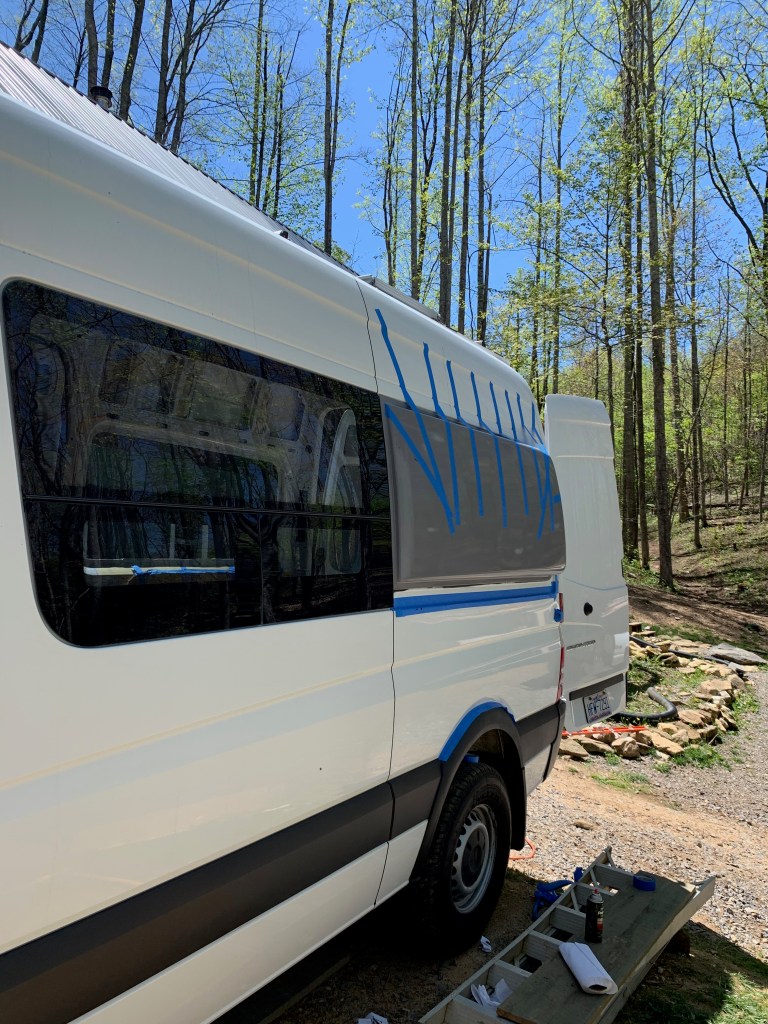
Adding Flares: These next two holes were the largest holes yet (and thankfully almost the last). We chose to add Flarespace flares to our van in order to sleep sideways and allow for more living space inside the van. I would have had no problem sleeping sideways without the flares, but given that Ed is 6’2″, he needed the extra space to sleep comfortably. See below for our flare install process.

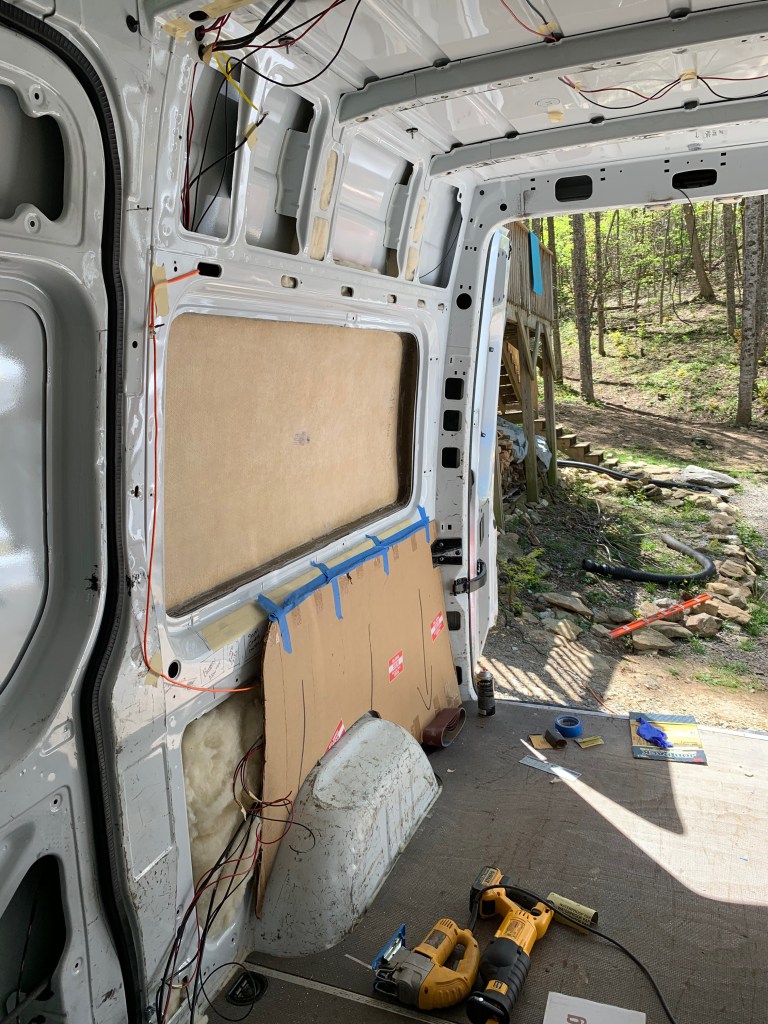
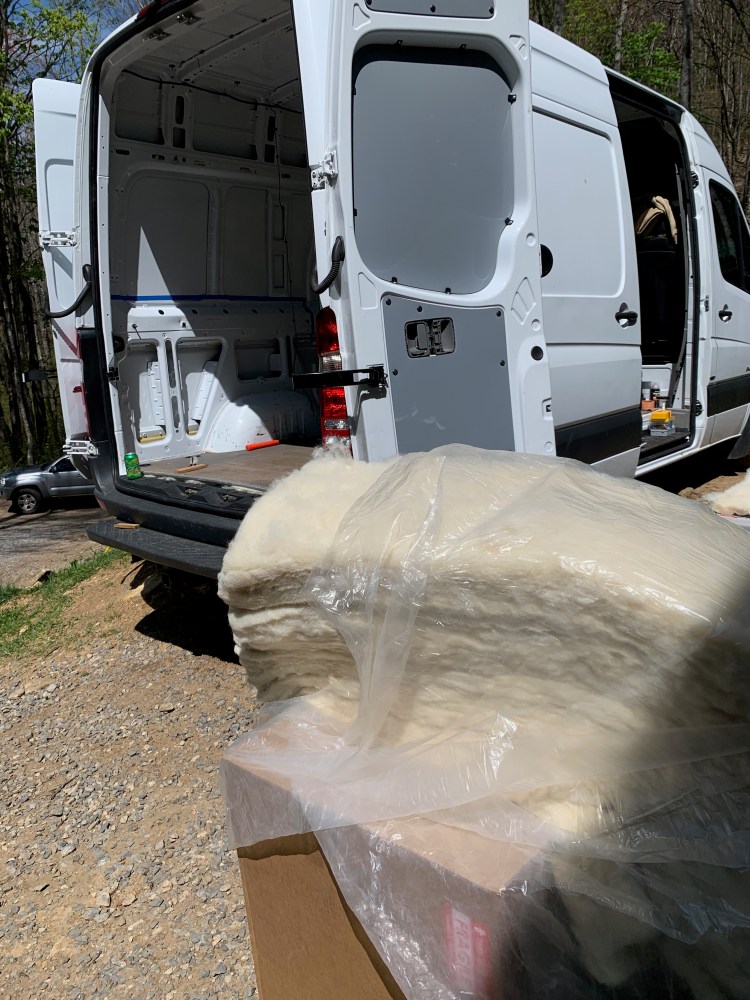
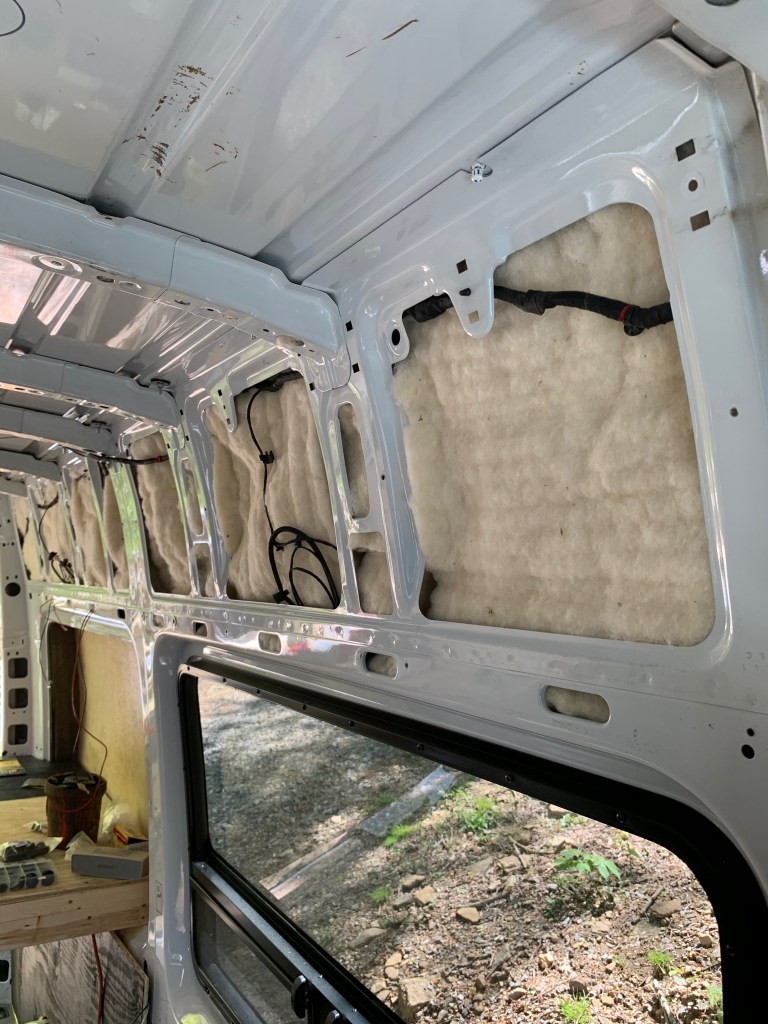
Insulation: For insulation we chose to go with Havelock Wool; it was a pretty simple decision, as we are both pretty health and environmentally conscience. It’s an awesome product and is very easy to work with. Some of it’s benefits are as follows: filters air and improves indoor air quality, suppresses mold and mildew, resists fire, absorbs sound, all natural, no off-gassing, are industry standard at 3.6 per inch, and loose-fill outperforms at 4.3 per inch.


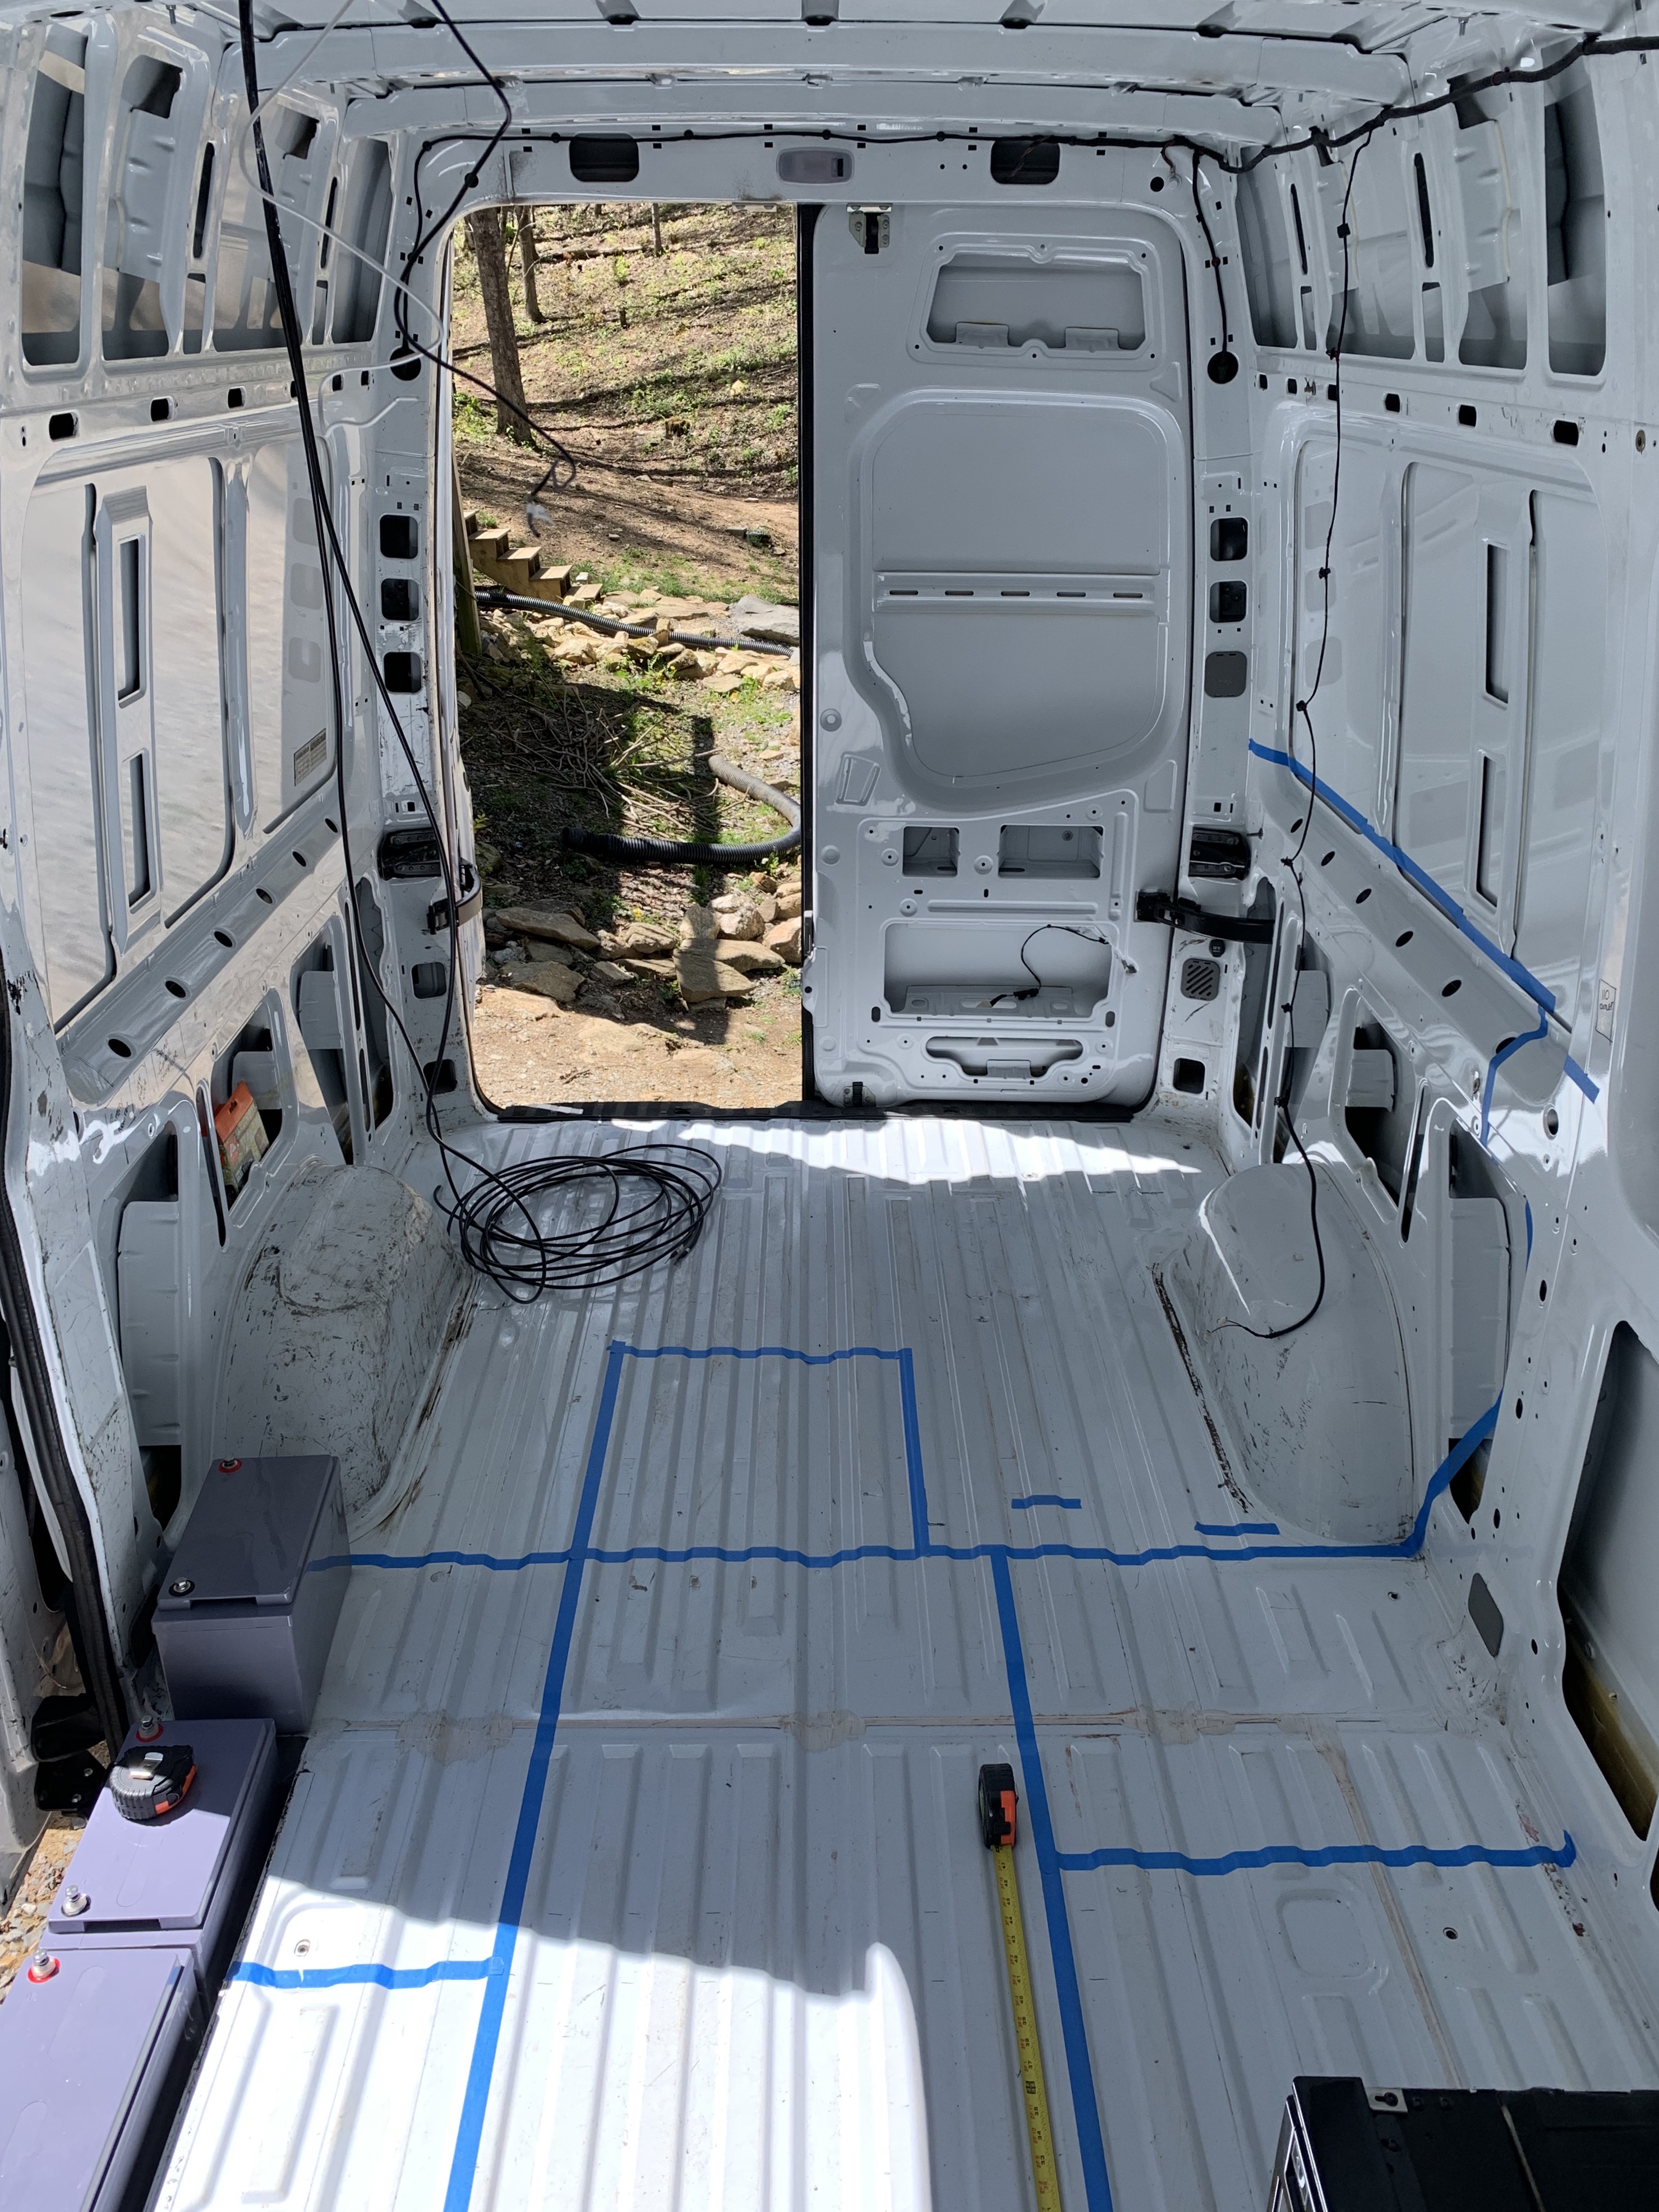
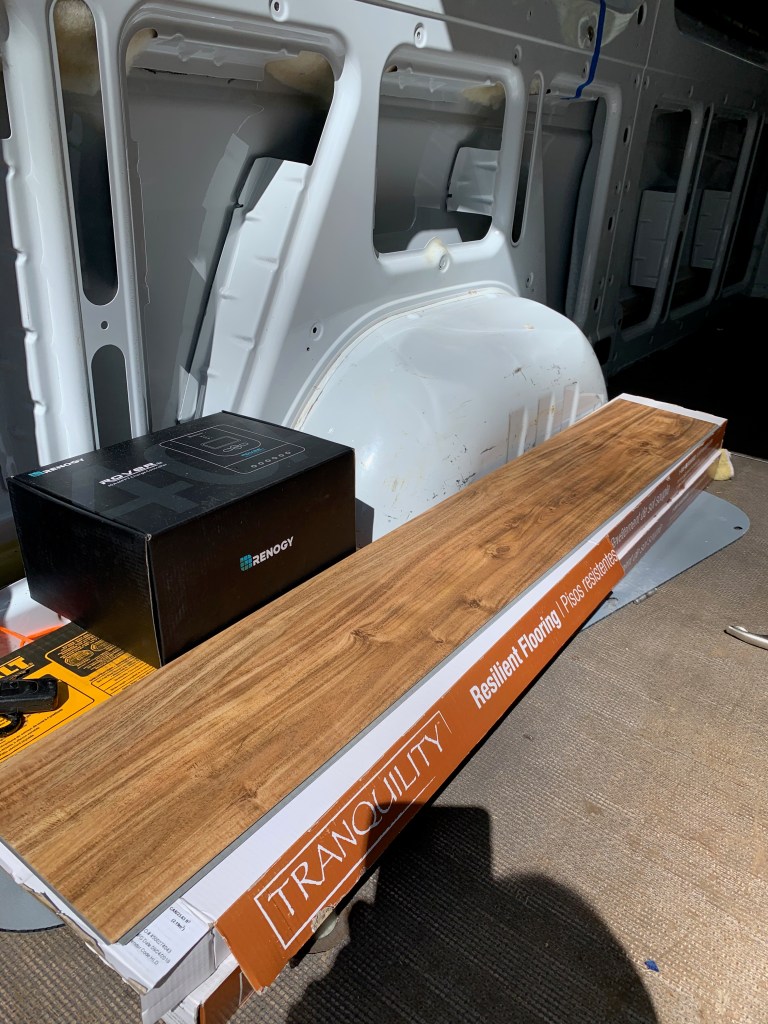
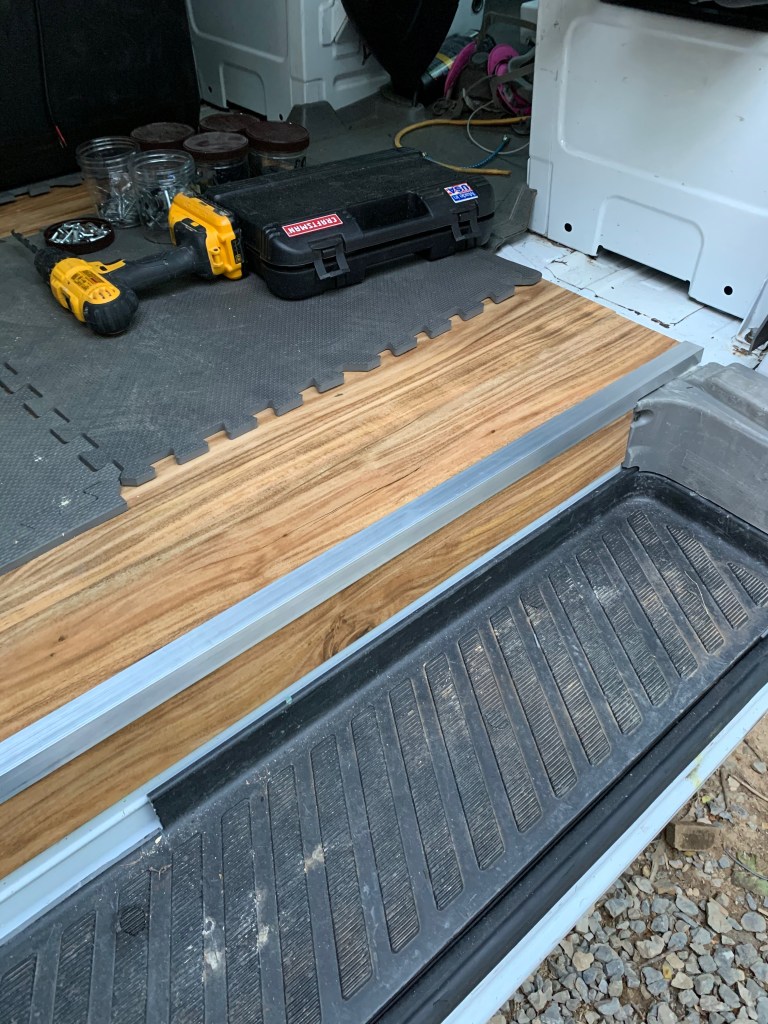
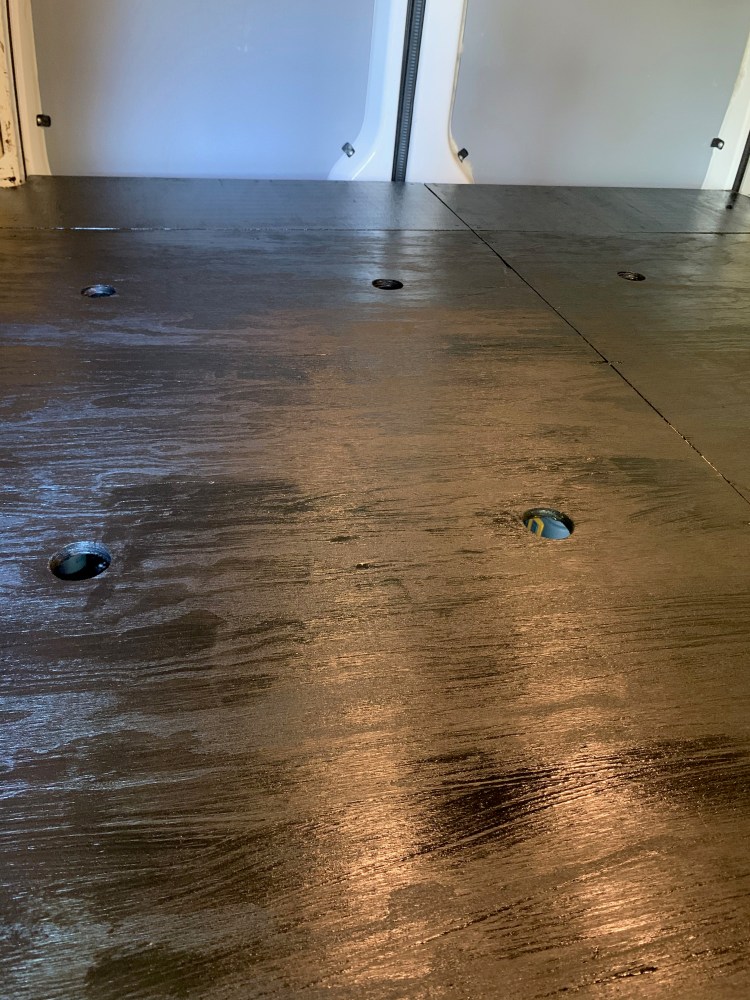
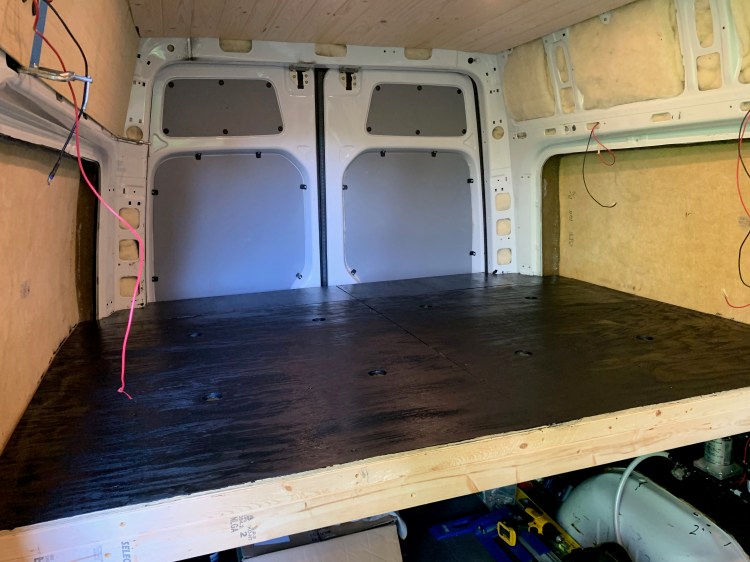
Flooring: We chose to do our flooring a bit differently than other van conversions we have seen. The van came with a removable subfloor, which was very durable and in great condition. First we removed the subfloor and added two layers of wool insulation, then we replaced and secured the subfloor. Unfortunately, I forgot to take any photos of that process, but you can get an idea of what we did from the photo below.

We then added click and lock LVP flooring directly on top of the original subfloor. However, we did not install the flooring over the entire subfloor of the van. We left the subfloor exposed at the back (aka the garage) of the van because we planned to install rubber interlocking mats like the ones you see in photo number 3 below.

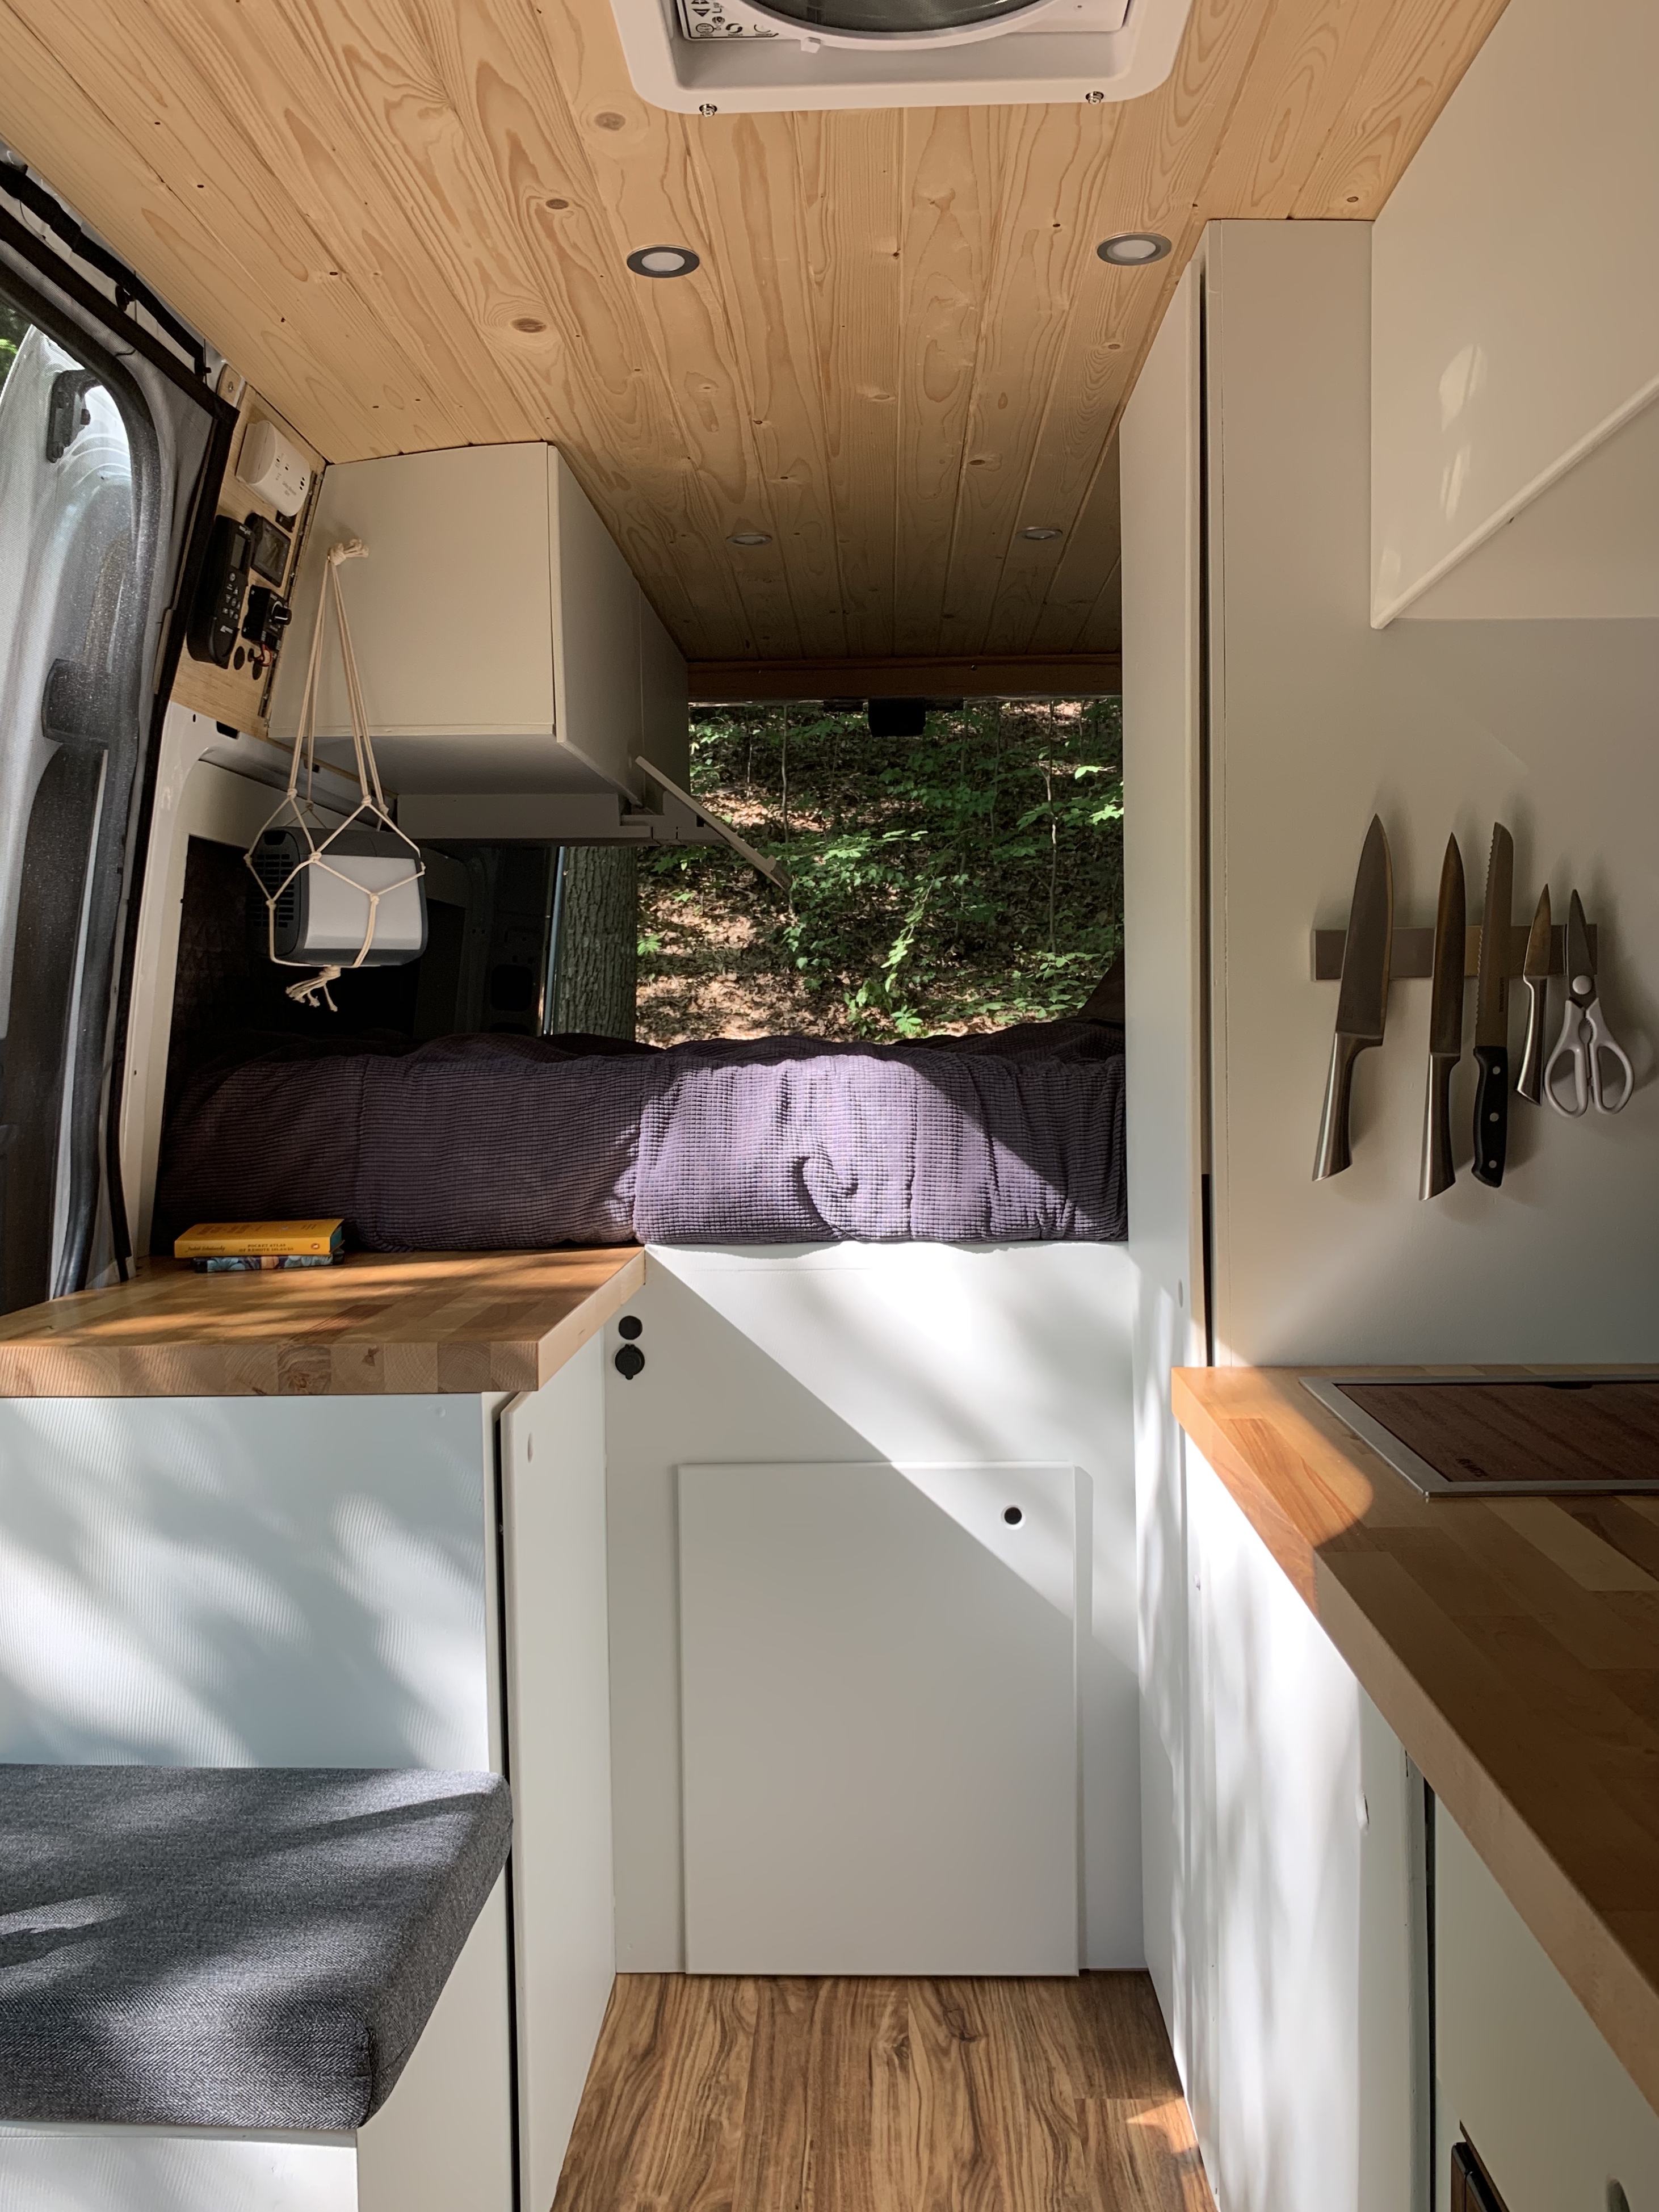
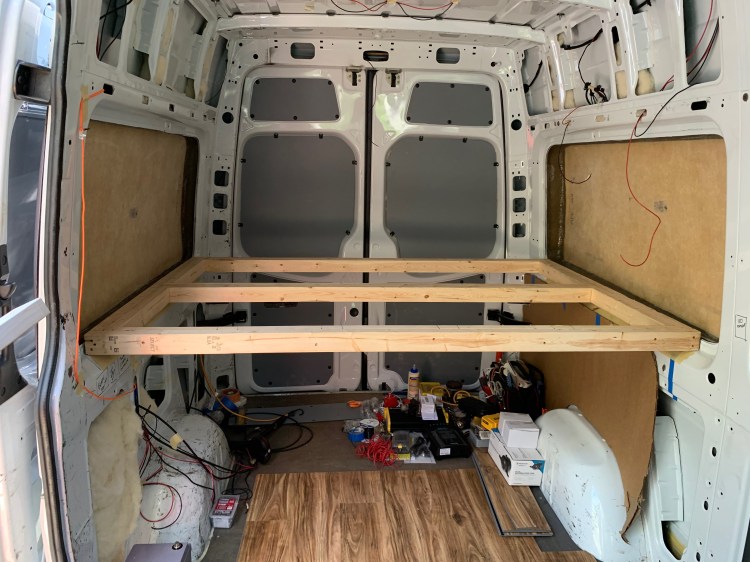
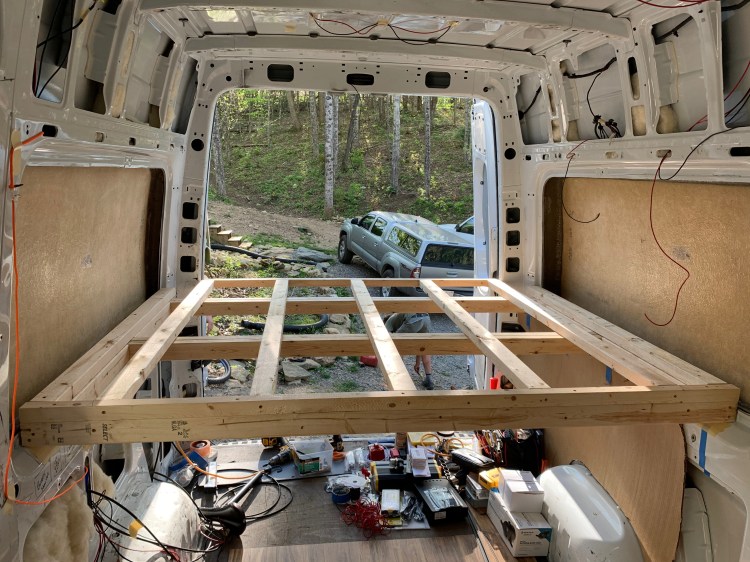
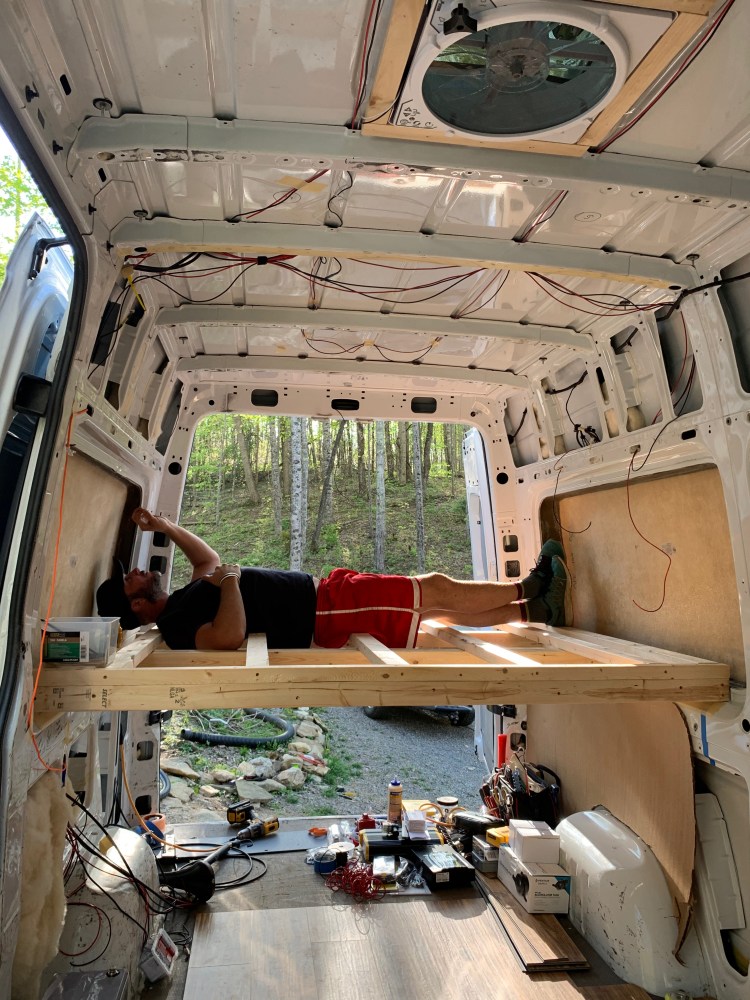
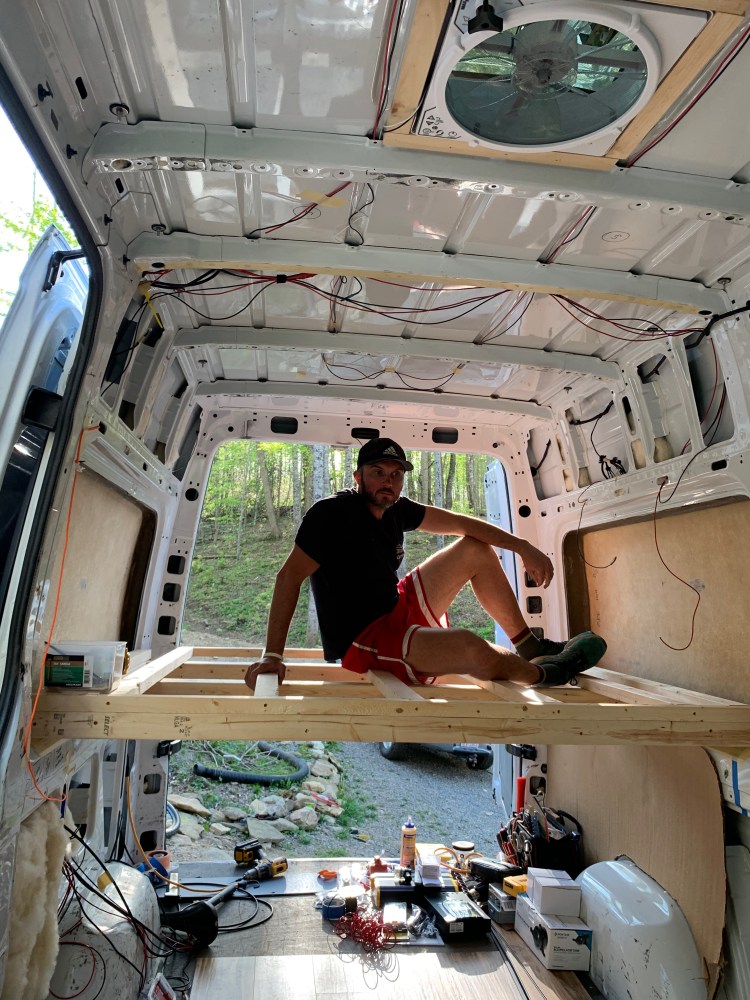
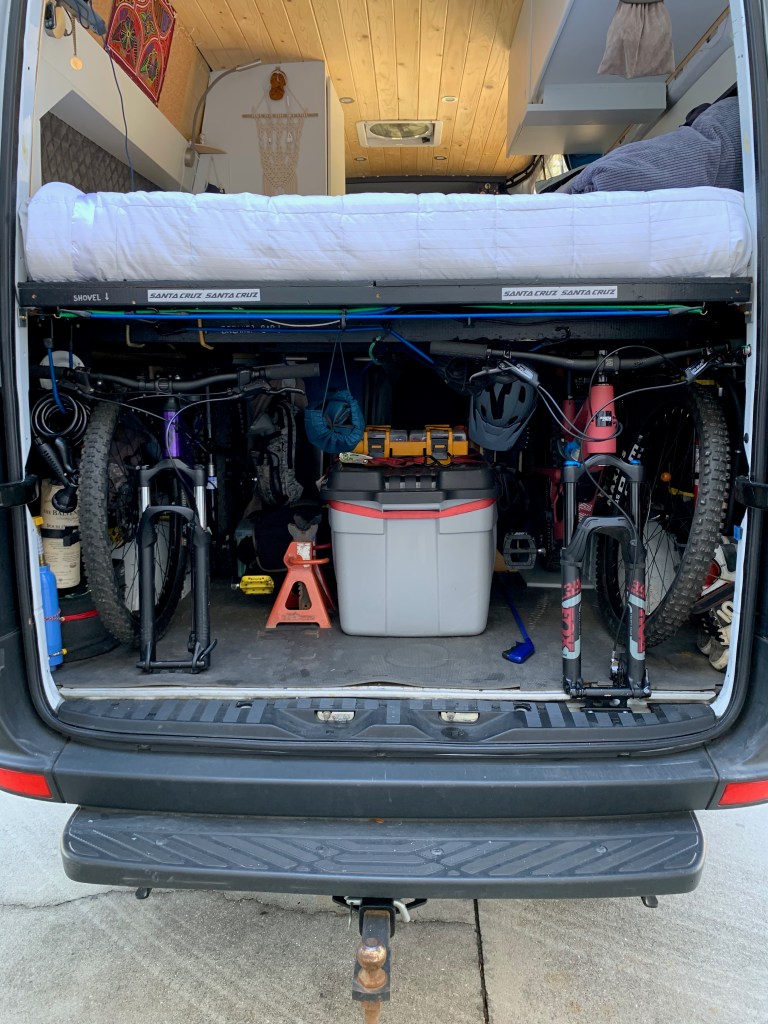
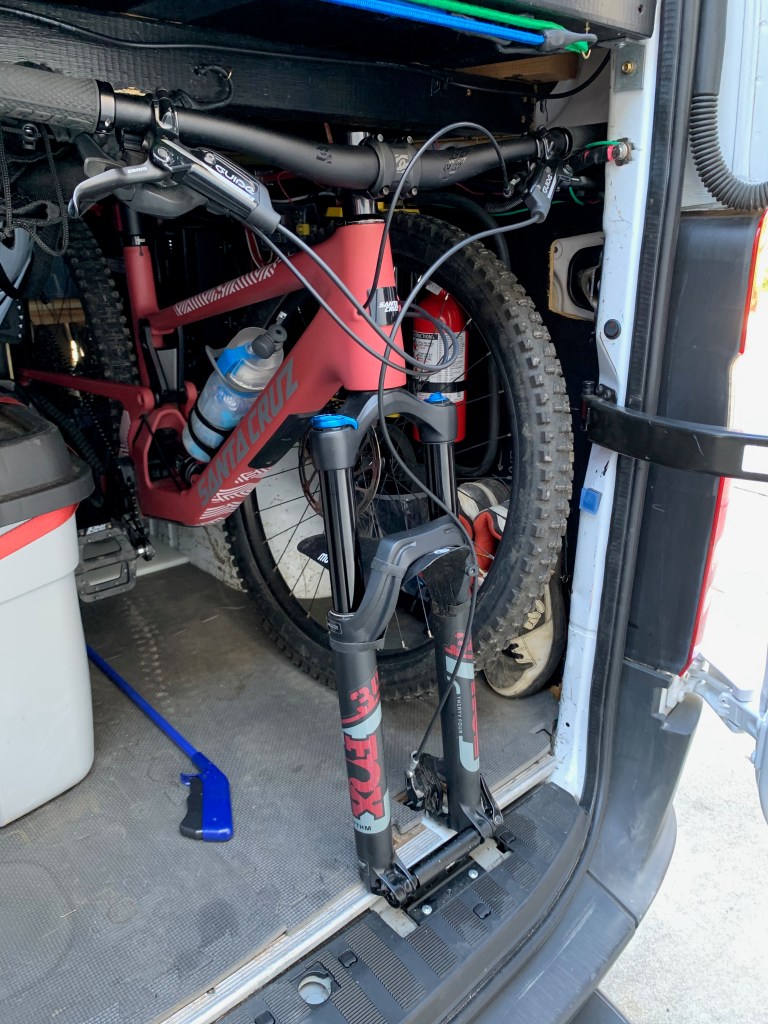
Van bed: The entire design for our van build was based around the size of our mountain bikes, which we knew we wanted to store below our bed at the back of the van. So while most van builds we’ve seen start with cabinetry and the kitchen, we started with the bed. Once we figured out how much space our bikes needed for storage and easy access, we then figured out how high our bed needed to be.
For our bed we chose to use 2″x3″ lumber for the frame and 1/2″ plywood for the top. After the bed was built and installed, we added a few layers of paint and drilled out 2″ holes for circulation beneath the mattress. The bed rests on the vans frame, and is also secured with brackets. The slideshow below shows our bed build process.

Now, for the most common things people ask us about our van (other than wanting to know how or where we shower)… “What is your source of power?” and “How much solar do you have?” Continue reading below for a general list of what we used. **If you’d like to know about what we used in more detail, please feel free to send us a private message via the “Contact” page or leave us a comment below.
- Roof rack: Ed constructed himself using 80/20
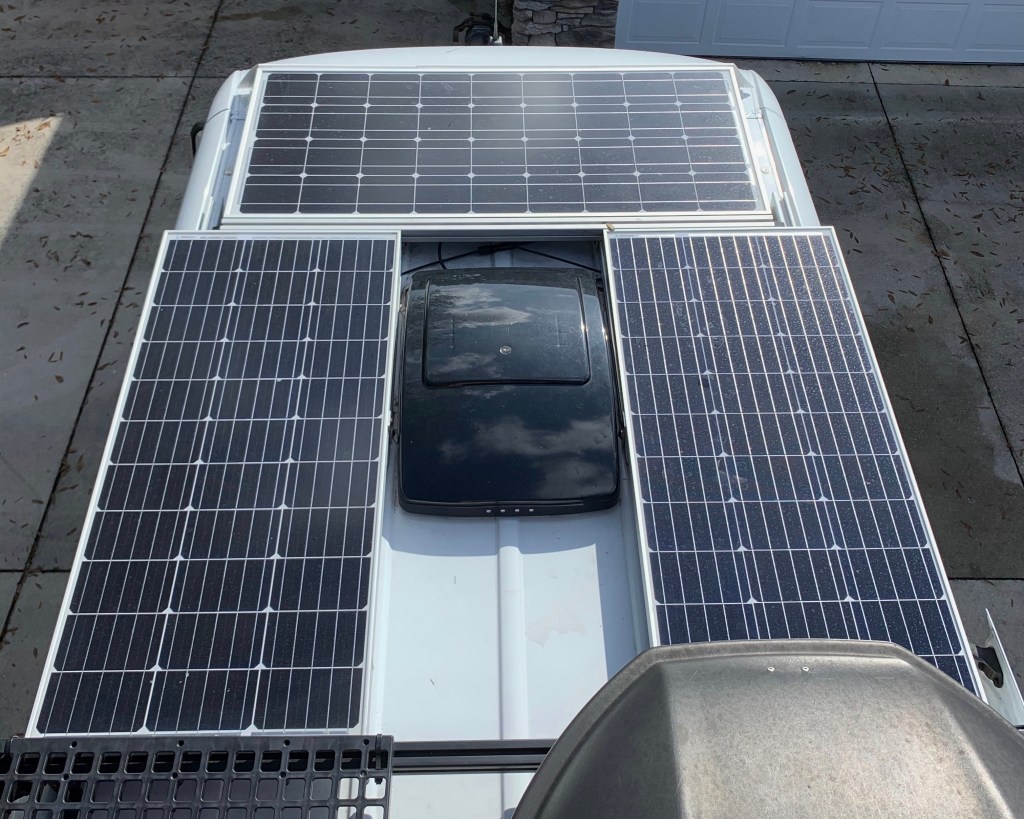
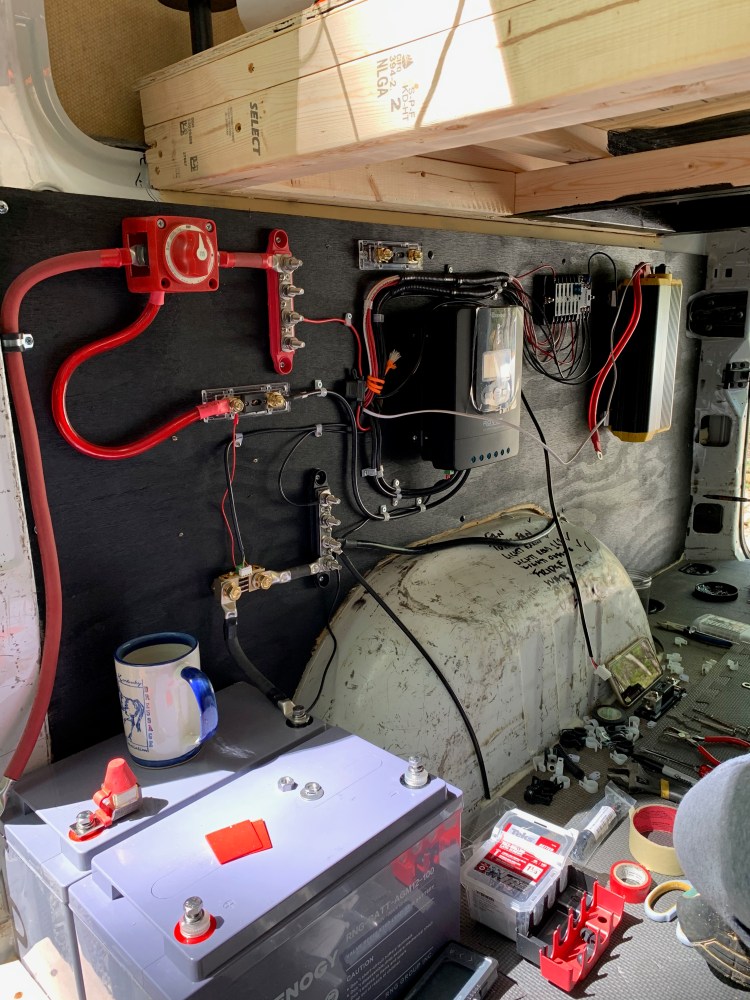
- Solar: *300 watts total*: 100 watt Renogy solar panel x3, Renogy 40 amp 12v/24v DC solar charge controller.
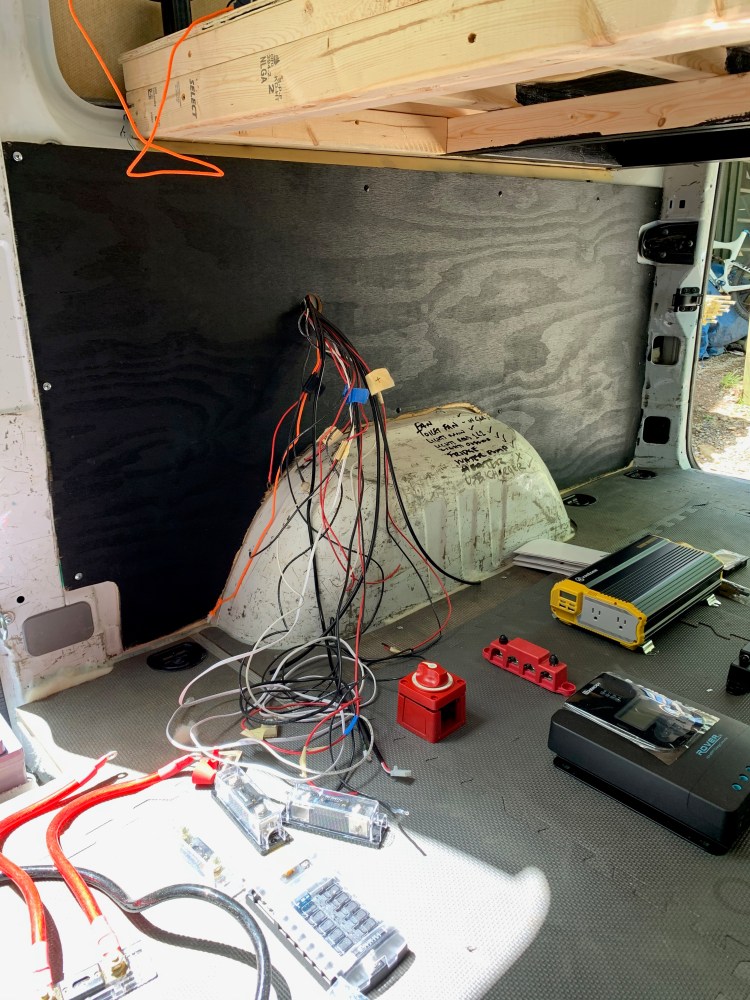
- Batteries: Renogy AGM battery x3, 12v 140 Amp dual battery isolator (to charge house batteries with alternator when driving), 1500 watt inverter.
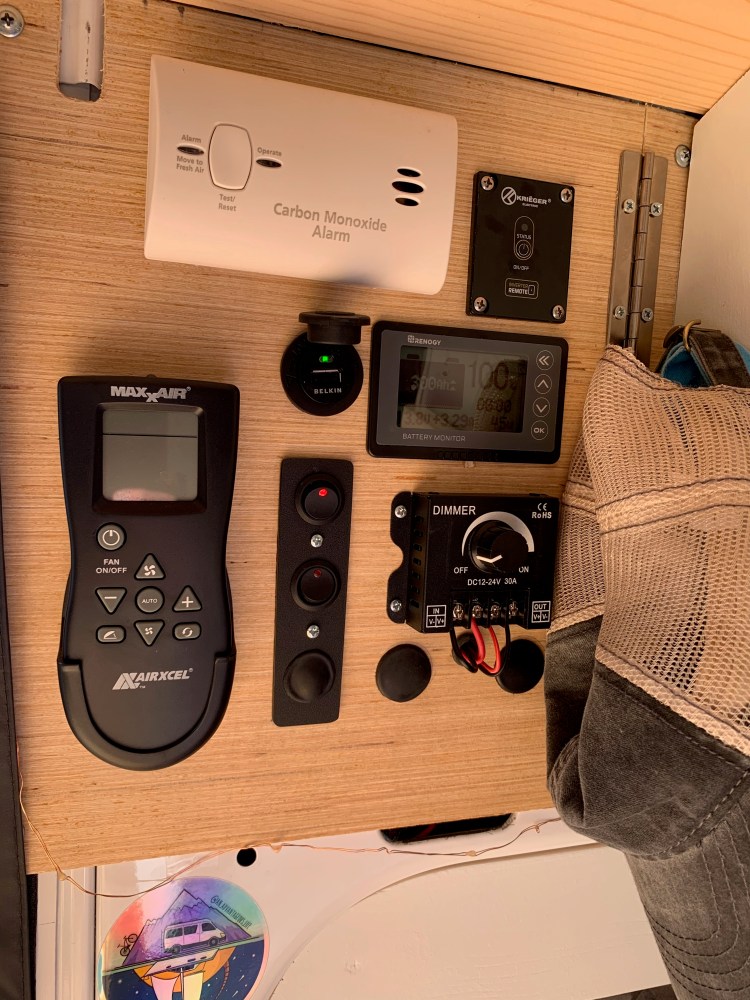
Below is our easily accessible control panel, as well as a progression of what I like to refer to as, The Motherboard, which is hidden beneath our bed:

If you’ve made it this far through our sprinter van buildout, I must say, thank you! Enter your email below to subscribe and be notified when part 2 is available. Cheers!
Other posts you may be interested in:
**Please feel free to leave a comment if you have any specific questions.
